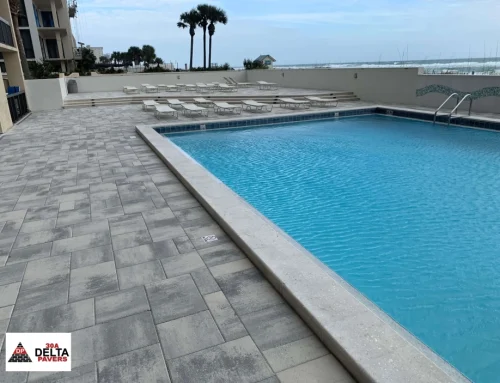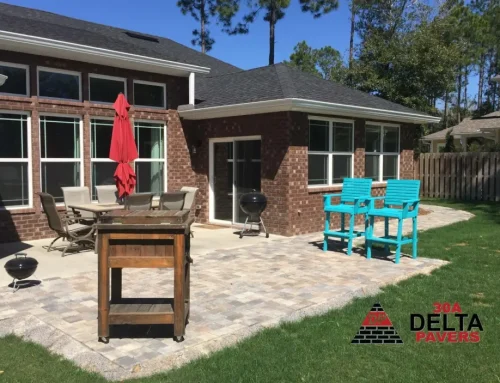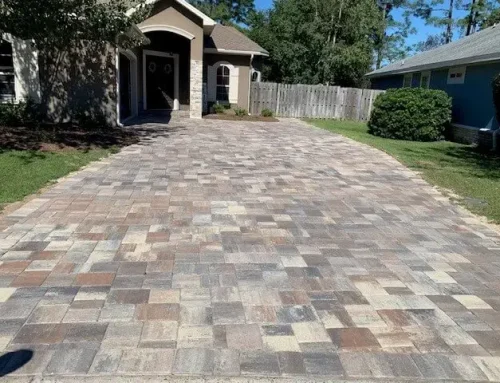
Pavers are one of the most durable outdoor surfaces you can install. But “durable” doesn’t mean “maintenance-free.” In Florida’s coastal environment, salt air, intense UV exposure, heavy rainfall, and humidity create conditions that gradually wear on any outdoor surface, and pavers are no exception.
Cleaning and sealing are the two maintenance tasks that make the biggest difference in how long your pavers look good and perform well. Done on the right schedule with the right products, they protect your investment and keep your driveway, patio, or pool deck looking sharp for decades. Skip them, and you’ll start seeing staining, joint erosion, weed intrusion, and surface fading well ahead of schedule.
This guide walks through the full process: when to clean, how to clean, when to seal, and how to choose the right sealer for your specific paver material. If you’d like a professional to handle the process for your property, reaching out to a trusted paving contractor 30A homeowners rely on is always a good option too.
Why the 30A Environment Makes Maintenance More Important
Before getting into the how-to, it’s worth understanding why the coastal Florida environment accelerates wear on paver surfaces more than most other climates.
Salt air: Airborne salt particles settle on paver surfaces and work into joints and pores. Over time, salt exposure contributes to surface deterioration, joint sand breakdown, and staining, particularly on natural stone like travertine and limestone.
UV intensity: Florida’s sun is relentless. Without a quality sealer, concrete pavers fade noticeably within a few years. Natural stone is more color-stable, but UV exposure still affects surface texture and any applied sealer over time.
Humidity and rainfall: The combination of heat and moisture creates ideal conditions for algae, mildew, and mold growth on shaded or damp paver surfaces. Left untreated, biological growth darkens the surface, reduces traction, and accelerates deterioration.
Pool chemicals: For pavers around pools and spas, chlorine splash and saltwater exposure add chemical stress on top of the environmental factors above. Regular sealing creates a protective barrier that slows chemical penetration significantly.
Step 1: Assess What Your Pavers Actually Need
Not every paver surface needs the same treatment. Before you buy products or rent equipment, take a close look at what’s going on with your specific surface.
Ask yourself:
- Is there general dirt and grime, or are there specific stains like oil, rust, or organic matter?
- Is there algae, mildew, or moss growth, particularly in shaded areas?
- Are the joints intact, or is sand washing out in areas?
- Are weeds growing through the joints?
- When was the surface last sealed, or has it ever been sealed?
- Is the sealer peeling, flaking, or showing white haze?
The answers shape your cleaning approach and determine whether you need to address joint sand before sealing. Trying to seal over dirty pavers, failing joints, or peeling old sealer creates more problems than it solves.
Step 2: Choose the Right Cleaning Approach
The cleaning method depends on what you’re dealing with. Here’s how to match the approach to the problem.
Routine Cleaning (General Dirt and Grime)
For pavers that are just dirty from normal use, a basic wash is usually all that’s needed.
What you’ll need:
- Garden hose or pressure washer (low to medium pressure, no more than 1,200 to 1,500 PSI for most pavers)
- Mild pH-neutral cleaner or a dedicated paver wash product
- Stiff bristle brush for stubborn spots
The process:
- Sweep loose debris off the surface thoroughly
- Wet the surface with clean water
- Apply the cleaner according to product directions
- Scrub problem areas with a stiff brush
- Rinse completely from one end to the other, working water away from structures
One important pressure washing note: use a wide-angle nozzle (25 to 40 degrees) and keep the wand moving. A narrow, high-pressure stream held in one spot will dislodge joint sand and can etch softer natural stone surfaces like travertine. Keep the pressure consistent and the nozzle at least 12 inches from the surface.
Algae, Mold, and Mildew
Shaded areas along 30A develop biological growth faster than you’d expect, especially during the rainy season. A standard wash won’t fully remove established algae or mildew.
What works:
- A diluted white vinegar solution (1 part vinegar to 1 part water) handles light biological growth on concrete pavers. Avoid vinegar on natural stone, as its acidity can etch limestone and travertine.
- A purpose-made paver efflorescence and algae cleaner is the safer choice across all paver types and handles heavier growth effectively.
- Apply, let dwell for the time specified on the product label, scrub, and rinse thoroughly.
Oil and Grease Stains
Driveways take the brunt of oil drips from vehicles, and those stains penetrate quickly on unsealed or under-sealed surfaces.
- Apply an alkaline degreaser or purpose-made concrete and paver degreaser directly to the stain
- Let it absorb for 15 to 20 minutes
- Scrub with a stiff brush
- Rinse with hot water if possible, or standard pressure
Old, set oil stains may need two or three applications. For travertine, always use a product specifically labeled safe for natural stone, as aggressive degreasers can damage the surface.
Rust Stains
Rust stains typically come from metal furniture, irrigation system minerals, or hardware left on the surface. They’re one of the trickier stains to remove.
- Use an oxalic acid-based rust remover rated for pavers or natural stone
- Apply carefully, following label directions closely
- Rinse completely after the recommended dwell time
- Never use muriatic acid on travertine or natural limestone, as it causes permanent etching
Efflorescence (White Haze)
Efflorescence is a white, powdery residue that appears on concrete pavers, caused by soluble salts migrating to the surface with moisture. It’s common on new installations and can reappear after heavy rain events.
- Light efflorescence often disappears on its own after a few wet-dry cycles
- For persistent haze, an efflorescence cleaner applied with a scrub brush and thorough rinsing usually resolves it
- Sealing after removal helps slow recurrence
Step 3: Address the Joints Before Sealing
This is the step most homeowners skip, and it’s one of the most important. Sealing over failing joints doesn’t protect them. It locks the problem in.
Before applying any sealer, inspect the joints across the entire surface. Look for:
- Areas where sand has washed out or eroded, leaving gaps between pavers
- Weed growth that needs to be cleared
- Cracked or crumbling joint sand
- Any pavers that have shifted and need re-leveling
For standard paver surfaces, replace missing or damaged joint sand with fresh polymeric sand. Sweep it into the joints dry, compact lightly, and mist with water to activate the binding agents. Let it cure fully according to the product’s directions, typically 24 to 48 hours, before applying sealer.
For permeable paver surfaces, use open-graded aggregate in the joints rather than polymeric sand to preserve the drainage function of the system.
Step 4: Choose the Right Sealer
Sealer selection is where a lot of homeowners make costly mistakes. Using the wrong product for your paver material or your desired finish can cause more harm than good. Here’s what to know.
Sealer Types
Penetrating sealers (also called impregnating sealers) soak into the paver material and create a barrier below the surface without leaving a coating on top. They don’t change the appearance of the paver. These are the preferred choice for natural stone like travertine and limestone, and for any surface where a natural look is the goal. They’re also the right choice for surfaces that need to maintain traction, since they don’t create a slippery film.
Film-forming sealers sit on top of the paver surface and create a visible coating. They come in wet-look, gloss, semi-gloss, and matte finishes. These are commonly used on concrete pavers when a color-enhanced or richer appearance is desired. The trade-off is that film-forming sealers can become slippery when wet if the wrong finish is chosen, and they require reapplication more frequently as the film wears.
Wet-look and enhancing sealers are a subcategory of film-forming sealers that deepen and enrich the color of concrete pavers. They’re popular on driveways and patios where homeowners want a saturated, vibrant finish.
Matching Sealer to Material
| Paver Material | Recommended Sealer Type | Notes |
| Concrete pavers | Penetrating or film-forming | Film-forming for color enhancement; penetrating for natural look |
| Travertine | Penetrating only | Film-forming sealers trap moisture in travertine’s pores |
| Limestone | Penetrating only | Same reason as travertine |
| Brick pavers | Penetrating or matte film-forming | High-gloss finishes look out of character on brick |
| Porcelain pavers | Generally not required | Dense surface resists penetration; check manufacturer guidance |
Step 5: Apply the Sealer
Timing and application conditions matter as much as product choice. Getting this step wrong wastes the product and can leave the surface looking worse than before.
Ideal conditions for sealing:
- Surface is completely dry (wait at least 48 hours after cleaning or rain)
- Air temperature between 50°F and 90°F
- No rain forecast for at least 24 to 48 hours
- Direct sun is manageable, but avoid sealing in peak afternoon heat, which causes the sealer to dry too quickly and streak
Application process:
- Make sure the surface is fully clean and dry. Any moisture trapped under sealer causes whitening and adhesion failure.
- Apply sealer in thin, even coats using a low-pressure sprayer, roller, or brush. Thin coats are always better than thick ones.
- Work in small sections and keep a wet edge to avoid lap marks.
- For film-forming sealers, apply a second coat after the first has dried to the touch, typically 1 to 2 hours depending on conditions.
- Keep foot traffic off the surface for at least 24 hours and vehicle traffic off for 48 to 72 hours.
Avoid over-applying film-forming sealers. A thick coat looks good for about a week and then begins to peel, cloud, or flake. If you can see the sealer pooling, you’re applying too much.
How Often Should You Clean and Seal on 30A?
The coastal environment along 30A accelerates wear compared to inland locations, so maintenance intervals need to reflect that.
Routine cleaning: Sweep regularly and rinse the surface every few months, or after any significant storm event that deposits sand or debris.
Deep cleaning: Once a year is a reasonable baseline for most 30A properties. Surfaces near beach access points, saltwater pools, or heavily shaded areas may benefit from twice-yearly cleaning.
Sealing schedule:
- Concrete pavers with film-forming sealers: every 2 to 3 years
- Concrete pavers with penetrating sealers: every 3 to 5 years
- Travertine near saltwater pools or heavy salt air exposure: every 1 to 2 years
- Travertine in standard conditions: every 2 to 3 years
- Brick pavers: every 3 to 5 years
A simple test tells you when it’s time to reseal: sprinkle a few drops of water on the surface. If they bead up, the sealer is still active. If they absorb into the surface within a few seconds, the sealer has worn, and it’s time to reapply.
Maintaining your paver surface on a consistent schedule is one of the most practical ways to protect the investment you’ve made. Our maintenance tips for paver driveways cover additional upkeep steps beyond cleaning and sealing that keep driveway surfaces performing well year-round.
Common Mistakes to Avoid
A few errors come up repeatedly with DIY paver cleaning and sealing, and they’re worth flagging before you start.
Pressure washing at too high a PSI: This is the most common mistake. High pressure dislodges joint sand, erodes soft stone surfaces, and can crack older or thinner pavers. Stay at 1,200 to 1,500 PSI maximum for most surfaces.
Sealing before the surface is fully dry: Moisture trapped under sealer causes whitening, cloudiness, and adhesion failure. Wait a full 48 hours after cleaning or rain before applying any sealer.
Using the wrong cleaner on natural stone: Acidic cleaners, including vinegar and many general-purpose cleaners, etch travertine and limestone permanently. Always check that any product you use is rated safe for natural stone.
Applying sealer over old, failing sealer: Peeling or flaking film-forming sealer needs to be stripped before reapplication. Applying new sealer over a failing film traps the problem and creates an even more difficult removal job later.
Skipping the joints: Sealing beautiful pavers over eroded, weed-filled joints is a wasted effort. Address the joints first every time.
Frequently Asked Questions
Can I pressure wash travertine pavers?
Yes, but carefully. Use a wide-angle nozzle, keep pressure below 1,200 PSI, and maintain at least 12 inches of distance from the surface. Travertine is softer than concrete, and high-pressure water can erode its surface texture and dislodge the material around its natural pores.
How do I remove weeds from paver joints without damaging the pavers?
Pull weeds by hand or use a joint scraper tool to remove them at the root. Avoid chemical weed killers in joints before sealing, as residue can interfere with sealer adhesion. Once joints are cleared and refilled with fresh polymeric sand, a good sealer significantly reduces future weed growth by limiting moisture and light in the joints.
Is it worth hiring a professional to clean and seal pavers?
For large surface areas, natural stone materials, or surfaces that haven’t been maintained in several years, professional cleaning and sealing typically delivers better results than DIY. Professionals have commercial-grade equipment, access to higher-quality sealers, and the experience to identify issues before they become bigger problems.
Can I seal pavers around a saltwater pool myself?
You can, but material and product selection matter more near saltwater pools than anywhere else. Use a penetrating sealer specifically rated for saltwater and chemical exposure, and plan on a shorter resealing interval than you’d follow elsewhere on the property.
What happens if I never seal my pavers?
Unsealed pavers still hold up reasonably well structurally, but they stain more easily, fade faster in UV exposure, and allow more weed and biological growth in the joints. In 30A’s salt-air environment, natural stone without sealer also deteriorates at the surface more quickly than it would inland. Sealing isn’t strictly required, but it extends both the appearance and the functional lifespan of the surface meaningfully.
Want a Professional to Handle It?
Cleaning and sealing pavers correctly takes the right products, the right timing, and a clear understanding of your specific material. If you’d rather have an expert take care of it, or if your surface needs more than routine maintenance, the team at 30A Delta Pavers is ready to help. Reach out to speak with a specialist about what your pavers need and get a plan in place before the next Florida summer hits.