The DIY Temptation Is Real
You’ve watched the YouTube videos. You’ve priced the pavers at the home improvement store. And on paper, the math looks compelling. Why pay a contractor when you could lay those pavers yourself and pocket the difference?
It’s a reasonable question, and unlike a lot of home improvement projects, paver installation actually is something a determined homeowner can attempt. The surface work is visible and learnable. But the full picture is more complicated than the videos suggest, especially in Florida’s coastal environment where the conditions that determine long-term success happen underground, before a single paver goes down.
This guide gives you an honest breakdown of what DIY paver installation actually costs, what it realistically risks, and where the line sits between projects that make sense to tackle yourself and ones where professional installation pays for itself many times over. If you’d like a local expert’s perspective on your specific project before making that call, a trusted paving company 30A homeowners rely on can give you a straight answer without a hard sell.
What DIY Paver Installation Actually Involves
Most homeowners who attempt DIY paver installation underestimate the scope of work that happens before the first paver touches the ground. The visible surface is maybe 30 percent of the actual job. The rest is underground work that determines everything about how the finished surface performs over time.
A proper paver installation involves:
- Excavation to the correct depth for the surface type, typically 8 to 10 inches for patios and 10 to 14 inches for driveways
- Removal and disposal of existing material, whether that’s grass, soil, concrete, or asphalt
- Subgrade compaction using a plate compactor on the native soil before any base material goes in
- Base material installation in compacted lifts, typically 4 to 6 inches of compacted gravel for patios and 6 to 8 inches for driveways
- Drainage planning including slope grading at 1 to 2 percent away from structures
- Bedding sand installation at a precisely consistent depth of approximately 1 inch
- Paver laying in the chosen pattern, including cuts at all edges and borders
- Edge restraint installation to lock the perimeter of the field
- Joint sand installation including compaction and polymeric sand activation
- Optional sealing after joint sand fully cures
Each of those steps has specific requirements that affect the final result. Skipping or shortcutting any of them doesn’t just reduce quality; it often creates problems that are more expensive to fix than the original professional installation would have cost.
The Real Cost of DIY: What Homeowners Typically Miss
The paver material cost is the easy part to price. What catches most DIY homeowners off guard is everything else. Here’s a realistic accounting of what a DIY paver project actually costs for a mid-size 400-square-foot patio in 30A’s coastal environment.
Materials
| Item | Estimated Cost |
| Concrete pavers (400 sq ft with overage) | $800 to $1,600 |
| Gravel base material (6 inches deep) | $300 to $500 |
| Bedding sand | $100 to $200 |
| Polymeric joint sand | $80 to $150 |
| Edge restraints and spikes | $100 to $200 |
| Sealer (optional first application) | $150 to $300 |
| Materials subtotal | $1,530 to $2,950 |
Equipment Rental
This is the category most DIY estimates ignore entirely, and it’s substantial.
| Equipment | Typical Rental Cost |
| Plate compactor (per day or weekend) | $80 to $150 |
| Wet saw or paver splitter (per day) | $60 to $120 |
| Hand tamper | $15 to $30 |
| Wheelbarrow (if not owned) | $20 to $40 |
| Screed rails and level | $30 to $60 |
| Safety equipment (gloves, knee pads, eye protection) | $40 to $80 |
| Equipment subtotal | $245 to $480 |
Disposal and Site Prep
Excavated soil and removed material have to go somewhere. For a 400 square foot patio excavated to 10 inches, you’re looking at roughly 12 cubic yards of material to dispose of.
| Item | Estimated Cost |
| Dumpster rental or haul-away | $300 to $600 |
| Utility marking (call 811, free but requires scheduling) | $0 |
| Disposal subtotal | $300 to $600 |
Total Realistic DIY Cost
| Category | Estimated Range |
| Materials | $1,530 to $2,950 |
| Equipment rental | $245 to $480 |
| Disposal | $300 to $600 |
| DIY total | $2,075 to $4,030 |
A professional installation of the same 400-square-foot patio along 30A typically runs $4,000 to $8,800, depending on material choice, pattern complexity, and site conditions. So the potential savings from DIY range from roughly $0 to $4,770 on a project of this size. That range is wide because both the DIY costs and the professional costs vary significantly based on the same factors.
The savings are real. But the question of whether those savings hold up depends entirely on what happens during installation.
Where DIY Goes Wrong in Florida’s Coastal Environment
This is the section the YouTube videos don’t cover, and it’s the most important part of this comparison for any 30A homeowner.
Inadequate Base Compaction
The single most common DIY failure point is insufficient compaction of the base material. Proper compaction requires multiple passes of a plate compactor on both the subgrade and each lift of base gravel, with moisture content in the right range for the soil type.
Homeowners who rent a plate compactor for a single day often don’t have enough time to compact properly across a large area and still complete the surface work. The result looks fine on day one. Within one to three rainy seasons, the base settles unevenly, and the paver surface develops dips, humps, and gaps that collect standing water.
On 30A’s sandy coastal soils, inadequate compaction is particularly damaging. Sandy soil that isn’t properly consolidated shifts readily with moisture changes and storm events. A professional crew with the right equipment and experience knows how to read compaction and how many passes each layer genuinely needs.
Incorrect Drainage Slope
Achieving a consistent 1 to 2 percent slope across an entire paved surface is harder than it sounds. A consistent slope requires accurate laser or string line setup before any base material goes in, and it requires checking the slope repeatedly as layers are added.
DIY installations that rely on eye judgment or occasional level checks frequently end up with low spots that collect water after rain. In Florida’s wet season, those low spots stay damp and become breeding grounds for algae, mold, and the biological growth that degrades paver surfaces and joint sand faster than any other factor.
Undersized Base for Florida Conditions
Online guides and home improvement store staff frequently recommend base depths appropriate for inland, frost-free climates with stable soils. 30A’s sandy coastal soils and high rainfall require base thicknesses at the higher end of the range, sometimes exceeding the minimums those guides suggest.
A DIY installer following generic guidance may build a base that’s appropriate for a drier climate with more stable native soil but inadequate for 30A’s specific conditions. That base performs fine until the first major storm season, when saturated soil and the weight of vehicles or foot traffic reveal the inadequacy.
Edge Restraint Failure
Edge restraints are the most frequently skipped or cheapened component in DIY paver installations. They’re not glamorous, they’re buried at the perimeter, and they’re easy to rationalize skipping or substituting with lighter-duty alternatives.
Without proper edge restraints installed at the correct depth and spacing, the outer rows of pavers gradually migrate outward over time. Once that migration starts, joint sand falls out of the widening gaps, weeds establish themselves, and the spreading accelerates. What started as a tight, professional-looking surface develops an obvious widening gap at every edge within two to three years.
Improper Paver Cuts
Every paver project has cut pieces at borders, curves, obstacles, and edges. Clean, accurate cuts require either a wet saw or a quality splitter, proper technique, and patience. Rushed or inaccurate cuts leave visible gaps and uneven edges that undermine the finished appearance regardless of how well the field work was done.
Natural stone like travertine requires more careful cutting technique than concrete pavers, and errors are harder to hide because the material variation makes each piece unique.
Polymeric Sand Activation Errors
Polymeric joint sand has a specific activation process: sweep dry sand into joints, compact, sweep again, then mist with water to activate the binding agents. Too much water washes the sand out of the joints. Too little water leaves the binding agents unactivated. Activating during high humidity or rain prevents proper curing.
Improperly activated polymeric sand doesn’t bind effectively, which means it washes out in the first rainy season and has to be reapplied. In 30A’s humid, rainy environment, getting the moisture and timing right for polymeric sand activation is genuinely tricky for a first-time installer.
The Hidden Cost: Fixing DIY Mistakes
This is the number that changes the math most dramatically. When a DIY paver installation fails due to base compaction, drainage, or edge restraint issues, fixing it properly typically requires removing and resetting at least a portion of the surface.
Professional correction of a failed DIY base typically costs as much as, or more than, a professional installation would have cost from the start. The reasons are practical: the corrective work involves the same excavation, base rebuild, and surface work as the original installation, plus the additional labor of removing and salvaging the existing pavers, some of which are often damaged in the process.
Homeowners who spent $2,500 on a DIY patio that settles and drains poorly within two years frequently end up paying $5,000 to $8,000 for a professional to correct it. That’s a worse financial outcome than a $6,000 professional installation from the beginning, and it comes with two years of living with a disappointing surface in between.
Where DIY Actually Makes Sense
None of the above means DIY paver work is always the wrong call. There are scenarios where it makes genuine sense.
Small decorative projects with low structural stakes: A garden path through landscaping, a small stepping stone area, or a decorative border around a planting bed involves minimal base work, low vehicle traffic, and low consequence if minor settling occurs. These are projects where DIY is entirely reasonable.
Paver repair and re-leveling: Lifting and resetting a small number of pavers that have shifted due to tree roots or minor settlement is accessible DIY work if the base beneath those units is otherwise sound. Knowing when the base is sound vs. when it needs rebuilding is the judgment call that matters here.
Sealing an existing professionally installed surface: A homeowner comfortable with basic surface preparation and careful product application can handle resealing an existing paver surface successfully. The risk of getting it wrong is relatively low compared to installation work.
Supplementary work on a professional installation: Some homeowners negotiate with contractors to handle lower-skill portions of the project themselves, such as demolition of an existing surface or final cleanup, to reduce the total contract price.
Where Professional Installation Pays for Itself
For the following project types, the case for professional installation in Florida’s coastal environment is strong enough that the math typically favors it even accounting for the higher upfront cost.
Any driveway: Vehicle loads, deep base requirements, drainage complexity, and potential Walton County permit requirements make driveway installation the highest-stakes paver project a homeowner can attempt. The consequences of base failure under vehicle traffic are rapid and expensive. Our detailed look at what affects paver installation cost on 30A explains exactly what professional contractors include in a driveway quote and why each line item matters.
Pool deck surrounds: Drainage around pools is critical for safety and for preventing moisture-related corrosion of pool equipment and structures. Drainage errors around a pool are expensive to correct and create ongoing safety concerns. The pool deck paver area is consistently one of the higher-risk DIY projects in terms of costly correction work.
Large patios over 300 square feet: The difficulty of achieving consistent compaction and slope over a large area scales with size. Small projects are forgiving. Large projects amplify every compaction or drainage shortcut across a significant surface area.
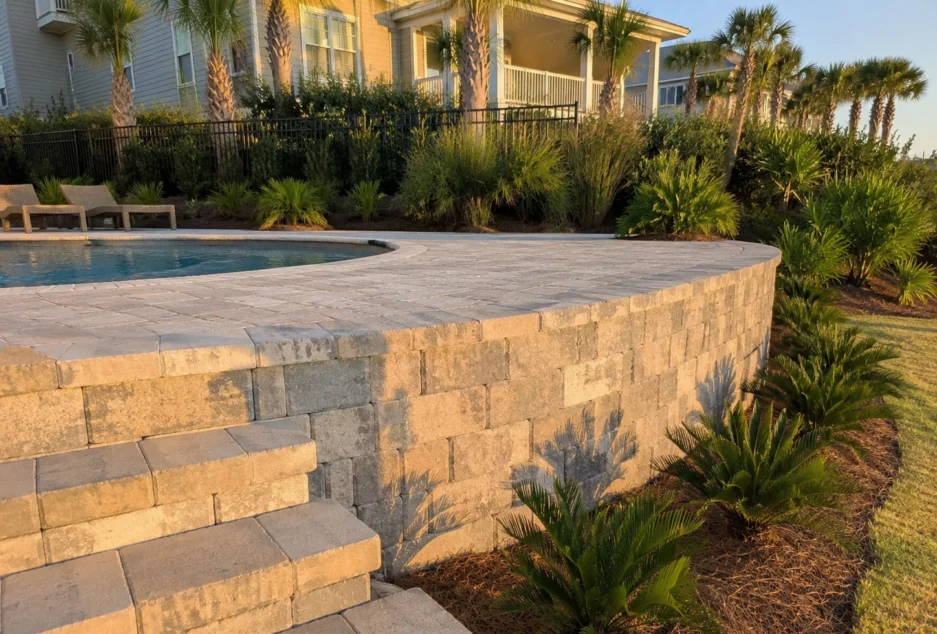
Any project involving retaining walls: Retaining wall pavers involve structural engineering considerations, drainage behind the wall, and geotextile fabric installation that are genuinely outside the scope of most DIY capability. A retaining wall failure is a safety hazard, not just an aesthetic problem.
Natural stone materials: Travertine, limestone, and other natural stone products require more precise cutting techniques, specific sealer compatibility, and handling care that makes professional installation the more reliable choice for homeowners who’ve invested in premium material.
Projects requiring permits: Any driveway work that connects to a county road in Walton County requires a permit and, in some cases, a driveway connection review. Professional contractors manage that process routinely. A DIY installer navigating it for the first time adds meaningful administrative complexity and delay risk to the project.
A Realistic Decision Framework
Before deciding whether to DIY or hire a professional, work through these questions honestly.
Do you have the right tools or a realistic plan to rent them?
A plate compactor, wet saw, and screed equipment are non-negotiable for a quality installation. If renting them adds $400 to $500 to your project cost, and you’ve never operated them before, factor that learning curve into your timeline estimate.
Is the project structural or decorative?
A driveway, pool deck, or large patio is structural. A garden path is decorative. The stakes are fundamentally different.
How much time do you have?
A 400-square-foot patio that a professional crew completes in three to four days typically takes a first-time DIY installer two to three weekends, weather permitting. In Florida’s rainy season, those weekend windows aren’t always available when you need them.
What’s your fallback if something goes wrong?
If a section of base settles after installation, are you prepared to lift and relay that section yourself, or does the cost of professional correction need to factor into your initial decision?
Does your HOA or Walton County require permits or approvals?
Confirming this before starting any work avoids the scenario where a completed DIY installation has to be modified or removed because it didn’t comply with applicable requirements.
Frequently Asked Questions
Can a homeowner legally install their own pavers in Walton County?
For most residential patio and walkway projects, yes. Driveway work that connects to a county road requires a permit and may trigger a driveway connection review regardless of who does the work. Always confirm with Walton County Building Services before starting any driveway project.
What’s the most common reason DIY paver projects fail in Florida?
Inadequate base compaction combined with insufficient drainage slope. Both problems are invisible once the surface is laid, and both cause progressive settling and drainage failure that worsens each rainy season. They’re also the hardest problems to correct after the fact without removing and rebuilding the entire surface.
Is it cheaper to buy pavers at a home improvement store vs. through a contractor?
Retail paver prices at home improvement stores are generally higher per unit than contractor pricing for the same or comparable materials. Professional contractors buy at volume pricing and have access to a wider range of products than retail stores typically carry. The DIY material cost savings are often smaller than homeowners expect once actual retail pricing is compared to contractor material cost.
Can I install pavers over an existing concrete slab to save on base work?
In some cases, yes, though it’s not the standard approach for full installations. Installing pavers over an existing concrete slab skips excavation and base work, but it only works if the existing slab is structurally sound, properly sloped, and at the right finished height relative to surrounding grade and structures. A slab that’s cracked, settled, or poorly sloped transfers those problems to the new paver surface above it. Our breakdown of the benefits of replacing concrete with pavers covers why the base and drainage work matters so much for long-term performance.
What questions should I ask a contractor to make sure they’re doing the job right?
Ask specifically about base depth and compaction method, drainage slope and direction, edge restraint type and installation depth, polymeric sand brand and activation process, and what their warranty covers. A contractor who answers those questions clearly and specifically is demonstrating real installation knowledge. Vague answers to specific technical questions are worth paying attention to before signing anything.
How long does a professionally installed paver project last compared to DIY?
A professionally installed paver project with proper base preparation and drainage routinely lasts 25 to 40 years with routine maintenance. A DIY installation that gets the base and drainage right can achieve similar longevity. One that gets those elements wrong may require significant corrective work within two to five years of installation, regardless of paver material quality.
Making the Right Call for Your Property
DIY paver installation can be a genuine money-saver for the right project, the right homeowner, and the right conditions. But in 30A’s coastal environment, where sandy soils, high rainfall, and salt air create specific demands that generic DIY guides don’t address, the gap between a well-installed and a poorly installed paver surface is larger than in most other parts of the country.
If you’re on the fence, the most valuable thing you can do before committing to either path is talk to a local professional who’ll give you an honest assessment of your specific project rather than a reflexive pitch. The team at 30A Delta Pavers is happy to walk through your project scope, give you a realistic professional quote, and help you understand where the risks actually sit so you can make the right call for your property and your budget. Reach out to speak with a specialist before the first shovel hits the ground.